
Computer basics tutorial
Cleaning Up Storage on Your Mac
Last updated November 24, 2025
Is your Mac running out of space? Getting warnings about a full disk or unable to install important security updates? This guide will help you free up storage space quickly and safely – and it only takes a few minutes!

💡 Why cleaning up storage is so important
When your Mac's storage reaches 90-100% capacity, bad things start happening:
- You can't install critical security updates: macOS needs free space to download and install updates. Without them, your computer is vulnerable to security threats.
- Your computer slows down dramatically: When storage is full, your Mac can't manage memory efficiently. This means slower performance, longer load times, and a frustrating work experience.
- Apps crash or won't save files: Without sufficient storage, applications may freeze, crash, or refuse to save your work – potentially losing important data.
- System instability: You may see error messages, files may become corrupted, and your Mac may behave unpredictably.
The good news? Cleaning up storage is straightforward, and this tutorial will walk you through it step by step.
📊 Check your current storage
First, let's see what's taking up space on your Mac.
- Click the Apple menu (🍎) in the top-left corner
- Select System Settings
- Click General in the sidebar
- Click Storage on the right
You'll see a colorful bar chart showing how your storage is being used across different categories like Applications, Documents, Photos, and System Data.
Look for categories that are using the most space – these are your best targets for cleanup.

🛠️ Use built-in storage optimization
Your Mac has helpful tools built right in! From the Storage screen we entered in the steps above, you may see recommendations from MacOS to do things like:
- Enable "Optimize Storage" options:
- Remove Apple TV movies and shows you've already watched
- Deletes old email attachments (but keeps them accessible in Mail)
- Turn on "Empty Trash Automatically"
- Files in your Trash take up space! This setting automatically deletes items that have been in the Trash for more than 30 days.
🧹 Manual cleanup: Quick wins!
Clean out Downloads
Your Downloads folder is often the biggest culprit. It's filled with files you downloaded once and never needed again like old installers (.dmg files), PDFs you've already read, and images you've already used
- Open Finder (you’ll find it in your Dock at the bottom of the screen, usually the first icon)
- Click Downloads in the left-hand sidebar (or press Cmd + Option + L)
- Sort or group by size (more info here)
- Delete files you no longer need
- Don't forget to empty the Trash when you’re done.
Remove old applications
Delete apps you don't use anymore.
- Open Finder
- Click Applications in the sidebar
- Drag unwanted apps to the Trash
- Empty the Trash
Tip: If you see a lock icon or get an error when deleting an app, right-click and choose "Move to Trash" instead.
Clear email (if using Apple’s Mail app)
This can free up significant space if you have years of email.
- Open Mail
- From the menu bar, choose Mailbox → Erase Junk Mail
- Then choose Mailbox → Erase Deleted Items
🔍 Find large files
Let's hunt down the biggest space hogs hiding on your computer.
- Open Finder
- Press Cmd + F to open search
- Click the first dropdown (currently showing "Kind") and instead select Other
- Scroll down to find, and click on, File Size and then click OK
- Set the condition to "File Size" → "is greater than" → enter a size like 1 GB (see the example in the image below)
- Review the results and delete files you don't need
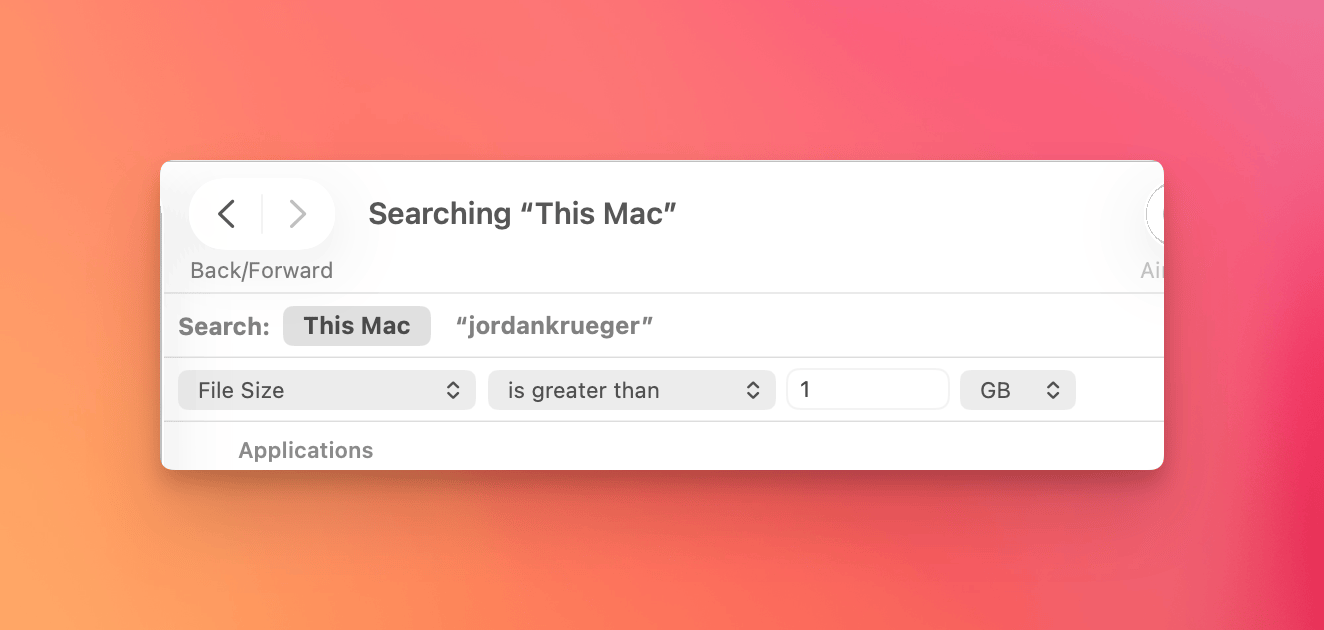
Common culprits:
- Old video files
- Disk images (.dmg files) from app installations
- Large ZIP archives
- Duplicate files
- Old project files
📁 Move files to Google Drive or Canto
Important: Instead of keeping large files on your Mac, upload them to Google Drive or Canto so they're accessible to the whole team and don't eat up your local storage.
For general work files → Google Drive
- Open Google Drive in your browser or use the desktop app
- Drag and drop large files to upload them
- Once uploaded and verified, delete them from your Mac
For media assets → Canto
- Upload photos, videos, and brand assets to Canto
- Once uploaded and organized, delete local copies
- Access them anytime through Canto
🗑️ Empty the Trash
Files you deleted are still taking up space until you empty the Trash.
- Right-click the Trash icon in your Dock
- Select Empty Trash
Or press Cmd + Shift + Delete while in Finder.
🔄 Restart your Mac
After cleaning up, restart your Mac:
- Click the Apple menu (🍎)
- Choose Restart
This clears temporary system caches and helps macOS recalculate available storage. You may see your available space increase after restarting!
Don’t worry, your tabs will be saved in your browser. Check out this tutorial for more information.
Contact IT
If you're still having trouble or aren't sure what's safe to delete, reach out to us. We're here to help!
✅ Quick maintenance checklist
Use this checklist for regular maintenance:
- Check storage levels monthly
- Clear Downloads folder weekly
- Empty Trash regularly
- Delete unused applications
- Upload large files to Google Drive or Canto
- Review and delete large files quarterly
- Keep at least 15-20% of storage free for optimal performance